Ultimate Guide to Storing Hiking Gear
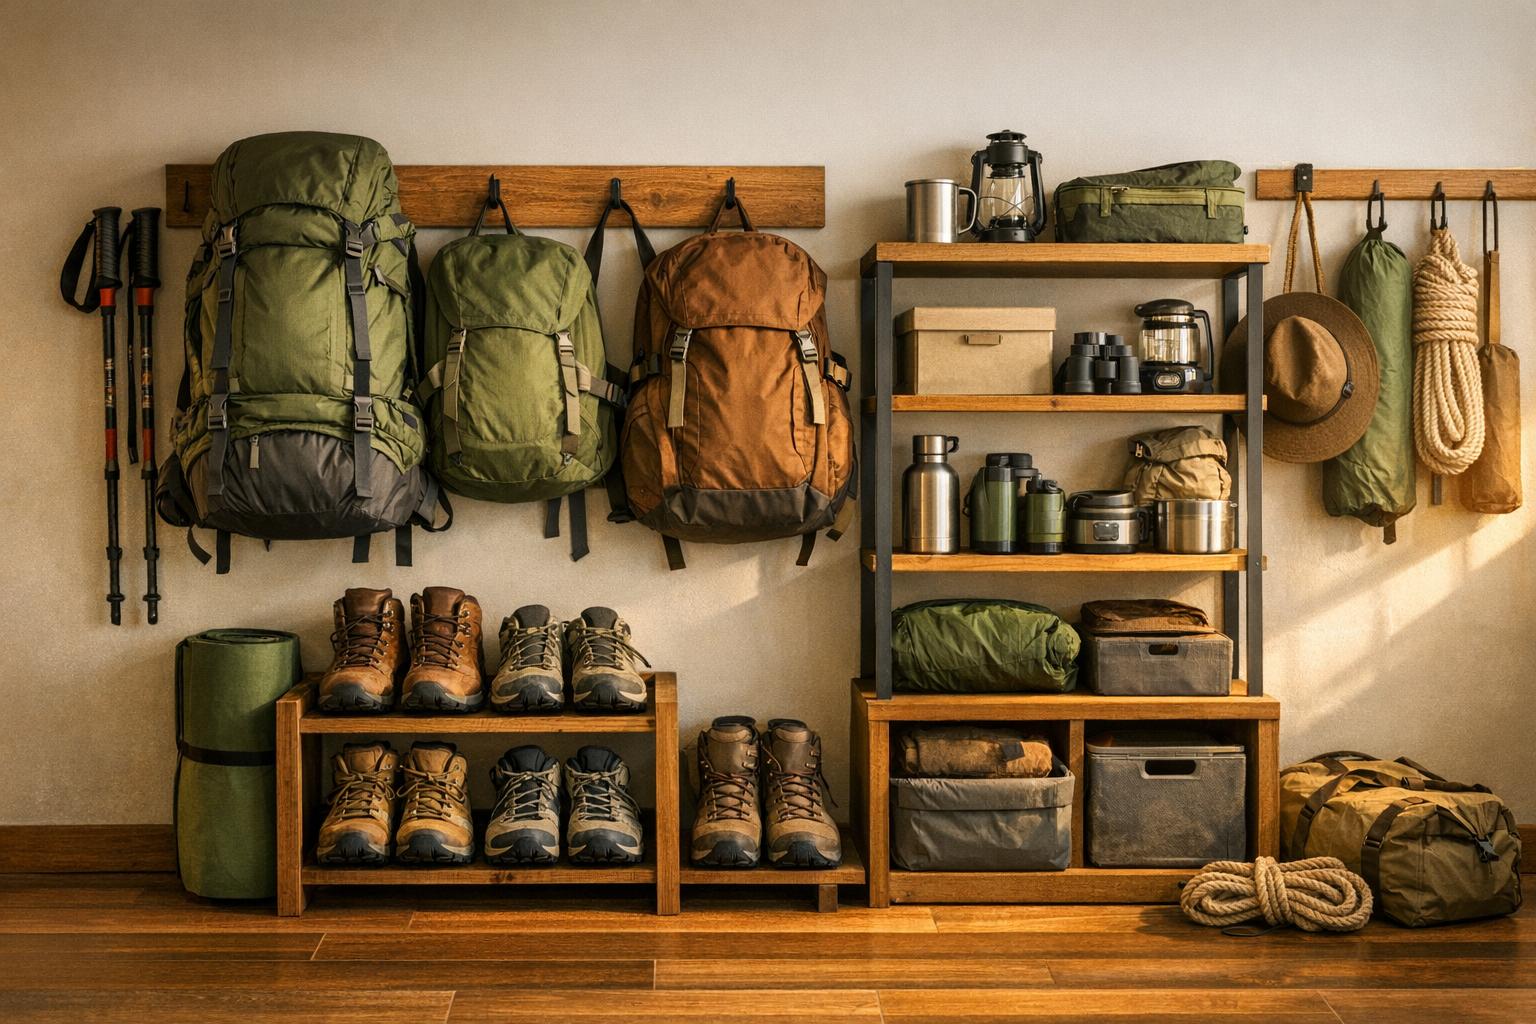
Your hiking gear is an investment, and proper storage is key to keeping it in top shape for years. Neglecting storage can lead to mold, damage, and reduced performance. Here’s what you need to know:
- Clean and Dry First: Always clean your gear with the right products and ensure everything is 100% dry to prevent mold and bacteria.
- Avoid Compression: Store sleeping bags and insulated items loosely to maintain their loft and warmth.
- Use Climate-Controlled Spaces: Protect gear from extreme temperatures, humidity, and UV light to prevent material breakdown.
- Inspect for Damage: Check for tears, leaks, or worn coatings, and address issues before storing.
- Organize Smartly: Use labeled bins, modular kits, and vertical storage solutions to keep everything accessible and protected.
Taking these steps ensures your gear stays functional, safe, and ready for your next adventure.
How To PROPERLY Store Your Backpacking Gear to Make It Last
sbb-itb-289f5f2
Preparing Your Gear Before Storage
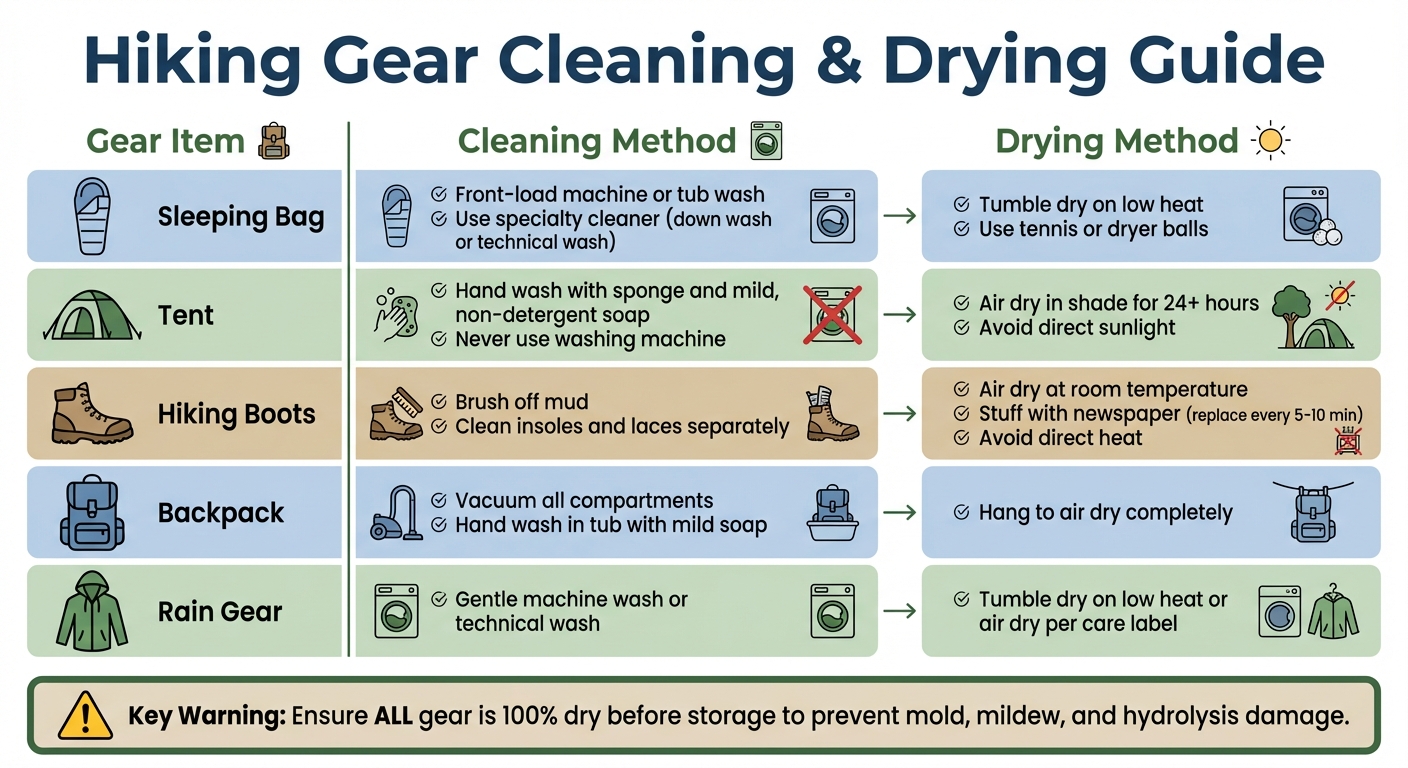
Hiking Gear Cleaning and Drying Methods Guide
Before stowing your gear away for the season, it’s essential to give it a little TLC. Skipping this step can lead to unnecessary wear and tear – even on high-end equipment. A thorough process of cleaning, drying, and inspecting your gear can save you from costly repairs or replacements down the road.
Cleaning and Drying
Start by checking the care instructions provided by the manufacturer. Avoid using household detergents, as they can damage waterproof coatings. Instead, opt for cleaning products specifically designed for outdoor gear.
For sleeping bags, a front-loading washing machine or a bathtub is your best bet. Top-loading machines with agitators can damage the internal baffles that keep the insulation evenly distributed. Use a technical wash for synthetic bags or a "down wash" for down-filled ones to preserve their loft. When drying, toss in a couple of tennis or dryer balls on low heat to break up any clumps and ensure even drying. Make absolutely sure the bag is fully dry – any lingering moisture can lead to mold.
Tents require a gentler approach. Never put them in a washing machine. Instead, hand wash them using a sponge and mild, non-detergent soap. Pay special attention to zippers, scrubbing away grit with an old toothbrush. As Sea to Summit cautions:
"Moisture is the enemy. If you put a wet tent back in its storage sack, mildew and mold are going to have a big, stinky party."
After cleaning, set up your tent in a shaded, well-ventilated spot for at least 24 hours to dry completely. Avoid direct sunlight, which can weaken the fabric and damage waterproof coatings.
Hiking boots need prompt attention after muddy adventures. Brush off dried mud, as minerals in the dirt can degrade both leather and fabric over time. Remove insoles and laces to clean and dry them separately. To speed up drying, stuff the boots with newspaper, replacing it every 5–10 minutes to draw out moisture.
Backpacks also need care. Vacuum all compartments to remove debris, then hand wash the bag in a tub with mild soap. Hang it to air dry completely. For hydration systems, disinfect with a bleach solution (1 tablespoon per gallon of water).
Why is all this effort worth it? Gore-Tex membranes, for example, can lose their breathability if clogged with skin oils. Storing damp gear can also trigger hydrolysis, a chemical reaction that breaks down polyurethane coatings, leaving them sticky or flaky. Always ensure your gear is 100% dry before putting it away.
| Gear Item | Cleaning Method | Drying Method |
|---|---|---|
| Sleeping Bag | Front-load machine or tub wash with specialty cleaner | Tumble dry on low heat with tennis or dryer balls |
| Tent | Hand wash with a sponge and mild, non-detergent soap | Air dry in the shade; avoid direct sunlight |
| Hiking Boots | Brush off mud and clean insoles and laces separately | Air dry at room temperature; avoid direct heat |
| Backpack | Hand wash in a tub and vacuum all pockets | Hang to air dry completely |
| Rain Gear | Gentle machine wash or use a technical wash | Tumble dry on low heat or air dry as per care label |
Ken Knapp, Editor Emeritus at REI, puts it simply:
"Grit left in place works a little like the grit in sandpaper, gently abrading fibers in materials whenever you’re using or wrangling your gear."
Once your gear is spotless and dry, it’s time to inspect it for any signs of damage.
Checking for Damage
The off-season is the perfect time to catch and address any wear and tear before it turns into a problem on your next trip.
For tents and shelters, examine all components, including poles, guy lines, zippers, and rain flies. Check for pinholes in the mesh and outer fabric using a flashlight test – have someone shine a light from outside the tent while you look for leaks from the inside. Inspect seam tape for signs of peeling and check polyurethane coatings for flaking.
Sleeping pads can be tested for leaks by inflating them and submerging them in water to spot escaping bubbles. Alternatively, leave a pad inflated overnight with some weight on it; if it deflates, you’ve likely got a leak.
Rain gear’s durable water repellent (DWR) coating can be checked by sprinkling water on the fabric. If water beads up and rolls off, the coating is still effective. If the fabric absorbs water, it’s time to reapply the DWR treatment.
Inspect electronics for corrosion in battery compartments and remove batteries to prevent leaks. Check that piezo igniters on stoves are sparking reliably.
Hiking boots deserve a close look too. Examine the leather for cracks and the soles for wear that could reduce traction. Lastly, review your first aid kit – replace expired medications, soggy bandages, or any missing essentials like ibuprofen or antiseptic wipes.
Spotting damage early gives you time to make repairs or replacements before your next adventure.
Applying Protective Treatments
Once your gear is clean, dry, and inspected, applying protective treatments can help it last longer in storage.
Reapply DWR spray to tents and rain gear if water no longer beads on the surface. This keeps them waterproof and breathable.
For leather boots, use a conditioner or beeswax while the leather is still slightly damp. This prevents cracking and keeps the material supple, even with temperature changes.
Zippers on backpacks and tents benefit from a silicone-based lubricant, especially if they’ve been exposed to salty environments. This step prevents them from sticking and extends their lifespan.
Store sleeping bags in large mesh or cotton sacks to avoid compressing the insulation. As REI explains:
"If you leave your bag in a compressed state (inside its stuff sack) for several months, it will lose resiliency and lofting ability."
This advice applies to both down and synthetic bags, as prolonged compression flattens the fibers that trap heat.
Selecting the Right Storage Location
Once you’ve cleaned, dried, and inspected your gear, the next step is finding a storage spot that keeps it safe from extreme temperatures, moisture, and harmful UV light. Proper storage is key to maintaining the longevity and performance of your outdoor equipment.
Temperature and Humidity
Choose a climate-controlled space where temperatures stay consistent and humidity levels remain low. As gear expert Michael Ta’Nous explains:
"The ideal outdoor gear storage environment is climate-controlled, with consistent temperature and low humidity."
Steer clear of areas like unfinished attics, basements, garages, or car trunks. These spaces often face drastic temperature and humidity changes, which can warp fabrics and damage materials. For example, high heat weakens nylon fabric blends and can degrade adhesives, stitching, and leather in hiking boots. Humid conditions are even worse – they encourage mold, mildew, and hydrolysis. Hydrolysis is a chemical reaction that breaks down polyurethane waterproof coatings, leaving your gear sticky, flaky, or with a bad odor. Unfortunately, once this happens, the damage is usually permanent.
To combat moisture, toss silica gel packets into storage bins. For inflatable sleeping pads, keep the valves open to let any trapped moisture escape, reducing the risk of mold growth.
Next, let’s talk about protecting your gear from UV damage.
Light and UV Protection
UV rays can wreak havoc on technical fabrics. They degrade synthetic fibers like nylon, making them brittle and reducing their strength. For instance, nylon webbing can lose about 30% of its tensile strength in just a few months of direct sunlight exposure, and after three years, the losses can climb to 50% or more.
UV damage doesn’t stop there – it can also ruin weatherproof coatings on tents and backpacks, causing them to peel or turn gummy. Warning signs of UV damage include fading, discoloration, stiffness, and fraying.
To avoid this, store your gear in dark spaces like a gear closet, opaque plastic bins, or a climate-controlled storage unit. After cleaning your tent or other fabric items, dry them in the shade or indoors instead of direct sunlight. When buying nylon-based gear, go for darker colors like navy, black, or hunter green. These shades tend to absorb UV radiation more effectively than lighter colors, which can help slow down fiber degradation.
Now, let’s ensure your gear gets the airflow it needs.
Airflow and Ventilation
Good ventilation is crucial for preventing moisture buildup, which can lead to mold, mildew, and even bacterial growth. Moisture, sweat, and body oils left on gear can weaken synthetic fibers and reduce fabric durability over time. Proper airflow also helps maintain the "loft" of sleeping bags, which is essential for insulation. Compressing sleeping bags in airtight sacks for long periods crushes their insulation, making them less effective.
Store tents and sleeping bags loosely in large mesh or cotton sacks or even oversized pillowcases to allow the fabric to breathe. Celia Binder, a thru-hiker and writer at Garage Grown Gear, shares this advice:
"The best practice is to store your tent loosely in a dry environment. And you want what’s best for your tent, right?"
For items like water bladders, bottles, and liquid-fuel stove bottles, leave the caps or valves open to promote internal airflow. Hang sleeping bags and pads vertically in a closet to prevent compression and maximize air circulation. Use multi-shelf racks to keep gear off the ground, especially in basements or garages, to avoid moisture wicking from the floor. If you’re storing gear in a basement or similar area, consider running a dehumidifier to keep humidity levels in check.
Storage Methods by Gear Type
Keeping your hiking gear in good condition requires specific storage techniques for each type of equipment. Here’s how to make sure your essentials are always ready for the next adventure.
Tents and Shelters
Avoid leaving your tent in its compression stuff sack between trips. Michael Ta’Nous, a writer at SelfStorage.com, explains:
"Storing your tent compressed puts stress on the material and restricts airflow, both of which can break it down prematurely".
Compression can weaken fabric fibers and damage waterproof coatings, while trapped moisture may lead to mildew or hydrolysis, a chemical reaction that makes polyurethane coatings flaky, sticky, or smelly. After your trip, set up your tent or drape it indoors for at least 24 hours to ensure it’s fully dry.
Once dry, switch out the stuff sack for a large mesh bag or a king-size cotton pillowcase (around 90 liters) and store the tent loosely to prevent creases. This method helps spread out wear and protects the waterproof layers.
For tent poles, store them partially assembled to reduce tension on the internal shock cord, which can lose elasticity if kept under constant strain. If space is tight, collapse the poles starting from the middle and work outward to distribute tension evenly. Before storing, use an old toothbrush to clean grit and sand from zipper teeth, which helps avoid sticking or breakage during your next trip.
Next up, let’s talk about preserving the insulation in sleeping bags to keep you warm through every adventure.
Sleeping Bags and Insulated Items
A sleeping bag’s warmth relies on its loft, the air trapped within its insulation fibers. Long-term compression can flatten these fibers, reducing their ability to trap heat.
After your trip, remove the bag from its travel sack immediately to avoid compression. Let it air out for 6 to 24 hours so any moisture or body oils can evaporate. If the bag has a waterproof shell, turn it inside out to ensure the insulation dries completely. Once dry, store it in a jumbo cotton or mesh storage bag (about 90 liters) or hang it by the foot loops in a closet. If you have extra space, laying it flat on a high shelf or under a bed is another great option to maintain even insulation.
If your sleeping bag loses some of its fluff, toss it in a dryer on the lowest heat setting with a few clean tennis balls to restore its loft. The same loose-storage approach applies to insulated jackets and puffy layers – hang them or lay them flat rather than compressing them.
Let’s dive into how to properly store backpacks, clothing, and accessories to keep all your gear in top condition.
Backpacks, Clothing, and Accessories
Before storing your backpack, empty all compartments, vacuum the seams to remove crumbs that could attract pests, and hand wash it in a bathtub using mild, fragrance-free soap. Technical gear needs gentle cleaning to preserve its coatings. Once it’s dry, store larger packs upright against a wall to support their frames, or hang smaller daypacks on hooks or S-hooks.
For hiking boots, clean off mud and salt immediately after your trip to prevent leather damage. Air-dry them at room temperature and avoid heat sources like radiators. Condition full-grain leather boots with a leather treatment before storing, and stuff them with crumpled newspaper to help maintain their shape while absorbing any leftover moisture. Test your rain jacket’s water repellency by sprinkling water on it; if the water doesn’t bead, it’s time to reapply a DWR treatment.
Remove batteries from devices like headlamps, GPS units, and radios to prevent corrosion from leaks. Clean hydration bladders and bottles thoroughly and store them with caps open to allow airflow and prevent mold. To organize small accessories, use clear plastic utility bins labeled by category – like "Cooking", "First Aid", or "Navigation" – so everything is easy to find when you’re packing for your next trip.
Organizing Your Storage Space
Keeping your gear organized isn’t just about tidiness – it saves time and ensures your equipment stays in good condition. One practical solution is to use clear, stackable plastic bins. These make it easy to see what’s inside without rummaging through, and you can usually find them for about $7 at home improvement stores. To make things even more efficient, label each bin by category using a label maker. For example, you might have bins for Shelter, Cooking, and First Aid.
Another helpful tip is to group your gear into modular kits. Keep items that serve a common purpose together. For instance, store your stove, fuel canister, utensils, and pot in a "Cooking Kit", and gather your sleeping bag, pad, and pillow into a "Sleep System Kit." As Philip Werner, founder of SectionHiker.com, advises:
"It really helps to store all of your outdoor gear in one central place or room… This helps reduce the clutter in the rest of my living space".
Consider creating an "Every Trip" bin for essentials you always need, like a headlamp, first-aid kit, repair tools, and the Ten Essentials. A sturdy 24-gallon heavy-duty tote works well for this purpose. With a system like this, you’ll be ready to label, sort, and use accessory tools to streamline your storage.
Labeling and Sorting
Labeling and sorting are key to staying organized. Assign categories to bins and sort gear by season and how often you use it. Keep frequently used items at eye level, and store heavier or dirtier gear lower to avoid messes. Jim Weller, an REI domain architect, suggests going a step further by placing laminated inventory checklists inside each bin. This ensures that everything gets returned to its proper spot.
Seasonal rotation also helps. When summer rolls around, you don’t want to dig through ski gear to find your hiking boots. By keeping gear for the current season accessible, you’ll save time and reduce wear on items you use less often. If you don’t have a dedicated closet, you can outline storage zones in your garage or basement using chalk. This helps keep your gear organized without blocking car doors or electrical outlets.
Storage Tools and Accessories
To make the most of your storage space, take advantage of vertical solutions like pegboards, wall hooks, and ceiling mounts. Pegboards are especially handy for securing oddly shaped items like helmets, climbing gear, and trekking poles. Annie Graeter, an REI program coordinator, got creative by installing a curtain rod between shelving units to hang rain jackets and life vests. She also built a custom peg rack from scrap wood to store skis and snowboards. Similarly, Pauli Payne, an REI marketing specialist, repurposed shelving brackets into heavy-duty hooks for backpacks and climbing ropes.
For smaller items like batteries, lighters, and sunscreen, over-the-door organizers are a great solution. Basic shelving units, often available for under $100, provide a sturdy base for your setup. To prevent moisture from damaging your gear, toss silica gel packets into your storage bins. For longer items, such as trekking poles or ice axes, try mounting wire wastebaskets vertically – they keep these items organized and easy to grab.
Conclusion
Taking care of your gear through proper storage isn’t just about keeping it tidy – it’s about ensuring it performs at its best when you need it most. By following the steps outlined – thoroughly cleaning and drying, avoiding compression for insulated items, opting for climate-controlled spaces, and organizing systematically – you can extend the life of your equipment and maintain its reliability.
As Emily Leikam from KÜHL puts it, "Putting in just a little bit of time and effort into keeping your gear cleaned, repaired, and stored properly has a big impact on its lifespan and performance." Simple actions like removing dirt, storing sleeping bags loosely, and taking out batteries can go a long way in preventing wear and tear or unexpected failures.
On top of that, a well-organized storage system with labeled bins and modular kits can save you time and reduce hassle. Instead of scrambling to find what you need, you’ll always be ready to grab your gear and head out for your next adventure.
FAQs
What’s the best way to keep my hiking gear mold- and mildew-free during storage?
To keep your hiking gear in top shape and free from mold or mildew, it’s crucial to clean all items thoroughly after every trip. Once cleaned, ensure everything is completely dry before putting it away. Opt for storage in a breathable cotton or mesh bag to allow airflow and avoid overly compressing your gear. Store your equipment in a cool, dry spot with low humidity, ideally in a climate-controlled area. Taking these steps will help your gear stay in great condition and ready for your next outdoor adventure!
How should I store my sleeping bag to keep it warm and fluffy?
To keep your sleeping bag’s loft – the fluffy insulation that keeps you warm – intact, proper storage is key. After every trip, remove it from its compression sack, shake out any dirt or debris, and ensure it’s completely dry. Once dry, store it loosely in a large, breathable cotton or mesh sack, or hang it up so the insulation has room to expand naturally.
Steer clear of damp spots like basements or overly warm areas like attics, as both moisture and heat can cause damage. Avoid long-term storage in a compression sack, as this can flatten the insulation and reduce its effectiveness. To keep your sleeping bag in top shape, give it some fresh air occasionally – this will help maintain its loft and have it ready for your next adventure.
Why should hiking gear be stored in a climate-controlled environment?
Keeping your hiking gear in a climate-controlled space is a smart way to shield it from the damaging effects of extreme temperatures and high humidity. Without this protection, your gear could fall victim to mold, mildew, rust, or even material breakdown, all of which can affect its performance and safety.
A stable environment with consistent temperature and low humidity helps preserve your gear’s quality. This way, it stays in great condition and is always ready for your next outdoor adventure.